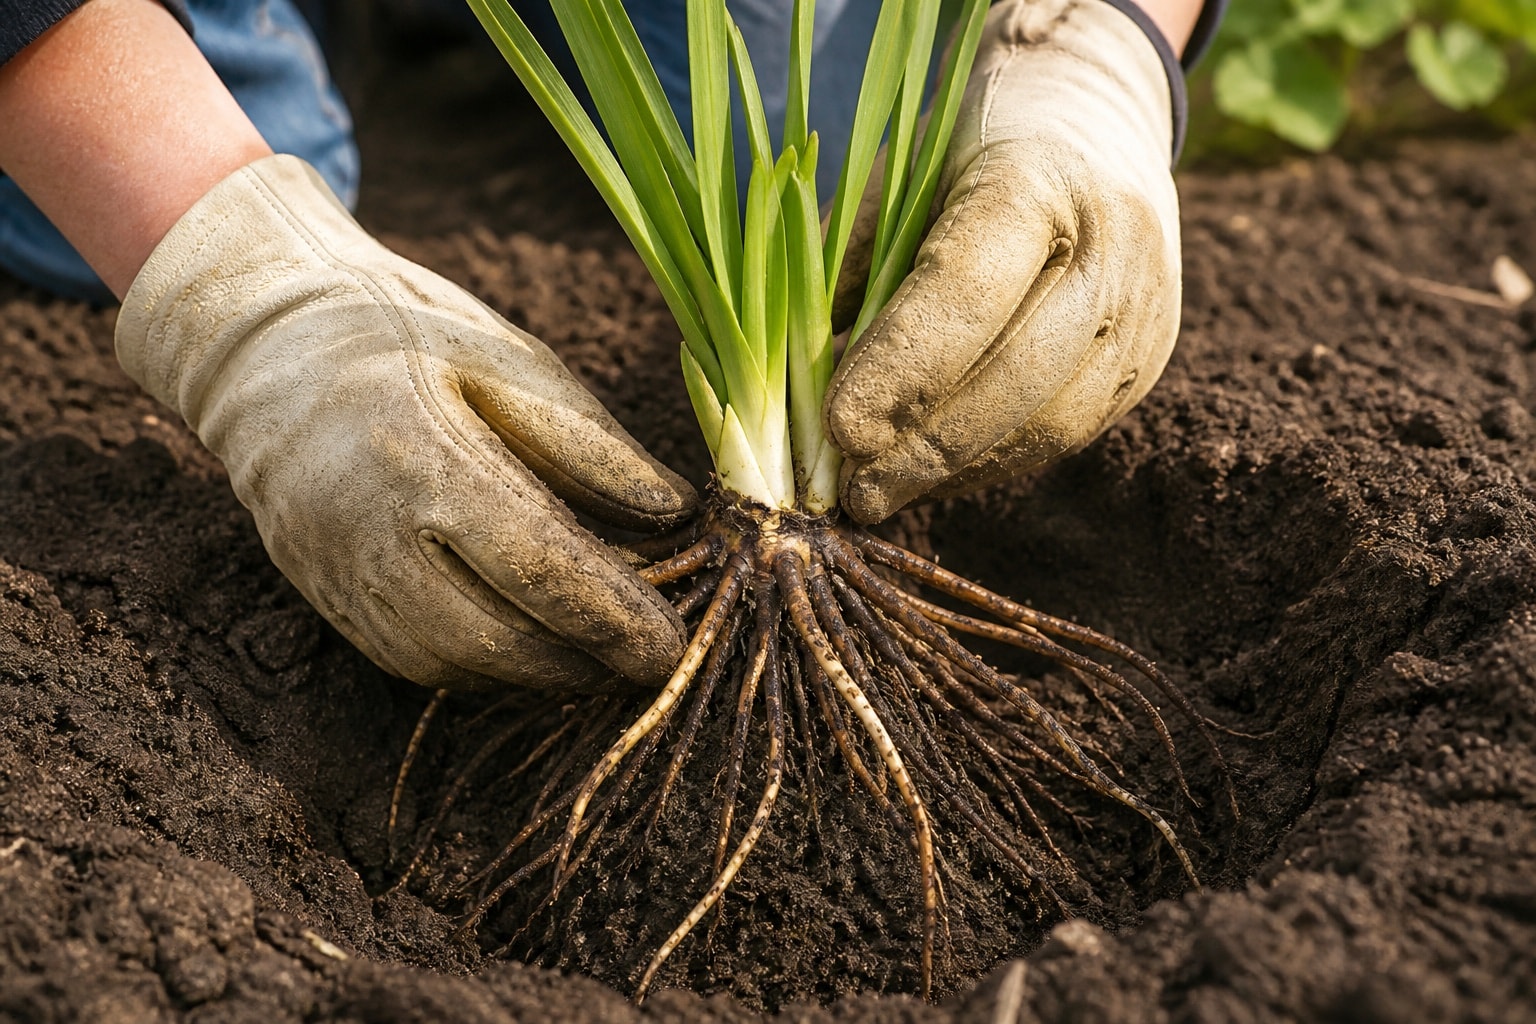
Successful planting is less about a complicated recipe than about matching roots and crowns to a stable site. Daylilies tolerate a broad range of garden conditions, yet their strongest flowering generally comes with useful sun, well-drained soil, and enough moisture during establishment. A few minutes spent reading the site can prevent years of weak bloom, crowded access, or recurring crown stress.
Read light and water together
Begin by tracking direct light over a full day. A site described casually as sunny may lose several afternoon hours behind a tree or structure. Warm climates may benefit from some relief during the hottest part of the day, while cooler gardens often need more direct sun for reliable flowering. The goal is not a universal number but a realistic record of the place.
Then watch water after a soaking rain. Water that disappears slowly from the surface may indicate compaction or a restrictive layer below. A slope may drain quickly at the top and remain moist at its base. Roof runoff can turn an apparently ordinary bed into a seasonal channel. Improve the site broadly instead of creating a small amended pocket that collects water around the crown.
A detailed university profile recommends sun to partial shade and well-drained soil with organic matter. Use that as a starting point, then adjust for the actual garden.
Prepare soil as a bed, not a hole
Loosen a useful area around the planting position so roots can move beyond the initial hole. Remove perennial weeds carefully. If organic matter is needed, blend a moderate amount through the broader root zone rather than packing concentrated material against the crown. Avoid reflexive fertilizing before a soil test shows a need; excessive nutrients can encourage lush foliage without solving drainage or structure.
Settle the soil before planting if the bed has been deeply worked. Freshly fluffed soil can sink, carrying the crown lower than intended. In heavy soil, a slight broad rise may help move surface water away, but a steep little mound dries unevenly. Good grading is subtle.
Handle roots and crowns calmly
If a division arrives bare-root, inspect it in shade. Trim only clearly damaged tissue with clean tools. Keep roots from drying while the hole is prepared, but do not leave the plant soaking indefinitely. Spread roots naturally over a low cone of soil, position the crown near the finished soil level, backfill gently, and water thoroughly to settle soil around the roots.
Planting depth deserves restraint. The crown should not disappear under a deep layer of soil or mulch. The exact relationship varies with soil texture and settling, so check again after watering. Pull mulch slightly back from the crown to keep the growth point readable and ventilated.
Space for the future task
Spacing should reflect the cultivar’s mature spread, the desired visual effect, and access for maintenance. A tight block fills quickly but may need earlier division and can make labels hard to follow. A broader interval looks spare during establishment but gives each clump room to express its form. In a mixed border, also consider the spread of neighboring perennials and the direction from which the clump will eventually be lifted.
Stage the session before unwrapping plants
Prepare every hole for the session before plants leave their wrapping. Set a shaded tray beside the bed for divisions waiting to be placed, with labels facing the same direction so identities remain easy to follow. Keep the kneeling pad, hand tools, water, and temporary markers within reach. Choose a realistic group for one session instead of opening every package at once.
Begin at one end of the bed and move in a single direction. Backfill, settle, label, and record each position before advancing, so finished soil is not walked over and open holes do not become mixed with completed work. Keep unplanted roots shaded while the sequence moves forward.
Stop with enough daylight left to rinse soil from tools, confirm that each label matches the bed map, and inspect the finished surface for settling or misplaced mulch. A smaller completed section is more useful than a larger area left with uncertain identities, exposed roots, or tools scattered for the next session.
The first weeks
Water deeply enough to moisten the root zone, then allow the soil surface to move toward normal conditions before watering again. Calendar-only watering is less useful than checking the soil. Newly planted divisions need consistent attention, especially during heat or wind, but constant saturation is not kindness.
Apply a moderate mulch layer for moisture conservation and weed suppression while keeping the crown clear. Delay judgments about flower performance. A recently divided plant is allocating energy to roots and fans; its first scapes may not represent mature behavior.
Planting checklist
- Record direct light and post-rain drainage.
- Prepare the surrounding bed and remove persistent weeds.
- Confirm the crown remains near finished grade after settling.
- Spread roots without sharply bending or circling them.
- Water to settle soil, not to keep the site permanently wet.
- Leave access for labels, observation, and future division.
After establishment, move to the seasonal care calendar. If the bed is part of a larger composition, the design notes can help coordinate spacing, repeated color, and companion foliage.